What Is A Grease Trap?
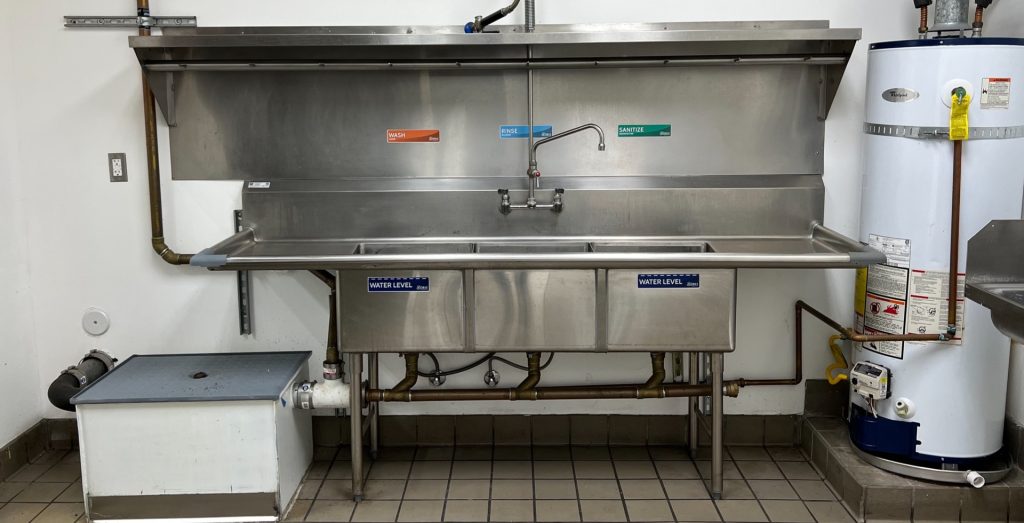
A grease trap, also known as a grease interceptor or grease separator, is a plumbing device used in commercial kitchens and food service establishments to capture and separate grease, fats, oils, and solids from wastewater before it enters the municipal sewage system or septic tank. Grease traps are an essential component of any commercial kitchen’s plumbing system and play a crucial role in preventing clogs, sewer backups, and environmental pollution.
Why Is Cleaning a Grease Trap Important?
There are three main reasons why it’s important to clean a grease trap:
- Prevent Clogs: In commercial kitchens, fats, oils, and grease (FOG) are often produced during cooking and cleaning. When FOG goes down the drains, it can solidify and accumulate in the plumbing system, leading to clogs and blockages.
- Environmental Compliance: Many local and national regulations require commercial kitchens to install and maintain grease traps to prevent FOG from entering the public sewage system. This is because FOG in the sewage system can lead to sanitary sewer overflows and water pollution.
- Cost Savings: Regular use of a grease trap can extend the lifespan of your plumbing system by preventing costly clogs and backups. It also reduces the need for frequent plumbing repairs and maintenance.

When To Clean a Grease Trap?
When operating a commercial kitchen, Best Management Practice requires the grease trap to be cleaned regularly to prevent back up and sewer contamination.
The frequency of grease trap cleaning depends on several factors, including the size of the trap, the volume of FOGS generated by the kitchen, and local regulations. Smaller traps and kitchens with higher FOGS production may require more frequent cleaning. As a general guideline, grease traps should be cleaned at least every 30 days. However, some jurisdictions may require more frequent cleaning, so it’s essential to check local regulations and follow any specific guidelines they provide.
In addition to scheduled cleanings, grease traps also require regular maintenance. This includes inspecting the trap for damage, checking for proper operation, and ensuring that all components are in good working condition. Grease traps that have major corrosion or deterioration can affect the performance of the device making it ineffective. It’s a good practice to visually inspect the grease trap regularly to see if it needs cleaning before the scheduled maintenance. Signs that it may need cleaning include a visible layer of grease at the top of the trap, slow drainage, or foul odors.

How To Clean A Grease Trap?
Cleaning a grease trap is simple when you have the proper tools, equipment, and proper source of disposal.
This is a step-by-step procedure for grease trap cleaning in commercial kitchens, the crucial aspect on cleaning the trap is the FOGS waste disposal. Additionally, we will discuss the importance of using a licensed grease hauler and the need for specialized equipment, such as commercial vacuum trucks, for larger grease interceptors.
- Safety First: Always start with safety in mind. Ensure that the person doing the job is wearing appropriate personal protective equipment (PPE), including gloves and eye protection.
- Turn Off Kitchen Equipment: Before beginning the cleaning process, shut down all kitchen equipment connected to the grease trap (if the trap is mechanical), including sinks and dishwashers. This step is essential to prevent accidental grease discharge during cleaning.
- Gather Necessary Tools and Supplies:
- A bucket or container for waste collection
- A scoop or spatula for scraping grease
- A grease trap cleaning brush or a high-pressure vacuum
- PPE (gloves, goggles, apron)
- A licensed grease hauler’s contact information for disposal
- Remove the Lid: Carefully remove the lid of the grease trap. Be cautious as some traps might have a buildup of noxious fumes.
- Inspect the Grease Trap: Examine the grease trap to assess its current state. Look for excessive buildup of grease, debris, or foul odors. This inspection will help you determine the extent of cleaning required.
- Scrape and Remove Debris: Use a scoop or spatula to carefully scrape off any solidified grease and debris from the trap’s walls and components. Place the collected waste into the designated container.
- Empty the Trap: Once the visible debris is removed, empty the remaining liquid content of the grease trap into the waste container. This liquid will contain a mixture of water and grease.
- Clean the Trap: Using a grease trap cleaning brush and scrapers, thoroughly clean the interior surfaces of the trap. Ensure that all grease and residue are removed.
- Inspect and Replace Components: Check the trap’s components, such as gaskets and baffles, for wear or damage. Replace any damaged parts to maintain the trap’s efficiency.
- Contact a Licensed Grease Hauler: This step is critical. The waste removed from the grease trap must be disposed of properly and in compliance with local regulations. Contact a licensed grease hauler, such as The Grease Company, to schedule a pickup for the waste.
- Reassemble and Test: Once the trap is cleaned and all components are in good condition, reassemble the trap and secure the lid. Turn on the kitchen equipment and test the system to ensure its functioning correctly.
- Maintain a Cleaning Schedule: Regularly scheduled grease trap cleaning is essential to prevent clogs, foul odors, and compliance issues. Create a maintenance schedule and stick to it to ensure the ongoing efficiency of your grease trap.
Proper grease trap cleaning is essential for the smooth and hygienic operation of commercial kitchens. It not only prevents clogs and foul odors but also ensures compliance with environmental and health regulations. Remember to follow the step-by-step procedure outlined above and always use a licensed grease hauler for waste disposal.
For larger grease interceptors, consider enlisting the services of a company with commercial vacuum trucks to efficiently and effectively maintain these critical components. By taking these steps, you not only ensure the safety and functionality of your kitchen but also contribute to responsible waste management practices.
